
By Dylan Beardsley August 20, 2026
A venue tour is often the point where a potential client stops thinking in abstract terms and starts imagining the event actually happening. Photos, floor plans and pricing sheets can create interest, but walking through the space gives people a clearer sense of how guests will arrive, where key moments will take place and whether the venue feels right for the occasion. That makes the tour an important part of the sales process. A well-run visit should do more than show rooms. It should help the prospect understand how the venue can support the type of event they are planning.
The strongest tours feel organised without feeling rehearsed. Staff know what the client has already discussed, the route through the property makes sense and the most relevant features are shown at the right time. Questions are answered clearly, limitations are addressed directly and the tour ends with a defined next step. A useful venue tour checklist helps teams deliver this experience consistently while still adapting each visit to the needs of the individual prospect. Preparation, route planning and follow-up all matter because the sale is rarely won by one impressive room alone.
Start With the Information You Already Have
The tour should begin before the prospect arrives. Review all information already collected through enquiry forms, emails, phone calls or previous conversations. Staff should know the event type, preferred date, estimated guest count, budget range where available and any special requirements already mentioned. Asking the same basic questions again can make the venue appear disorganised and can waste time that could be spent discussing more useful details.
This preparation also helps the person leading the tour decide what to emphasise. A corporate organiser considering a conference will have different priorities from someone planning a wedding reception. One may care heavily about presentation equipment, breakout space and guest flow, while the other may focus more on ceremony locations, photography opportunities and dining arrangements. The tour should reflect those priorities rather than following the same script for every visitor.
Confirm the Appointment Properly
A tour can begin badly before the visitor even reaches the property if directions, parking instructions or meeting details are unclear. Send a confirmation that includes the date, time, venue address, where to enter and any information needed about parking or check-in. If the property is large or has several entrances, make it obvious where the visitor should go.
The confirmation can also mention approximately how long the tour will take. This helps clients plan their day and prevents the visit from feeling rushed because they expected a 20-minute walkthrough and the venue planned for an hour. If several decision-makers are involved, encourage them to attend where practical. It is easier to answer questions and build confidence when the people influencing the final decision experience the venue together.
Prepare the Venue Before the Client Arrives
The venue should look ready to host business, even when no event is currently taking place. Entrances should be presentable, unnecessary equipment should be stored and spaces included in the tour should be clean and accessible. Small operational details can shape a client’s impression more than staff expect. A cluttered hallway, locked room or pile of furniture can make the venue feel less organised.
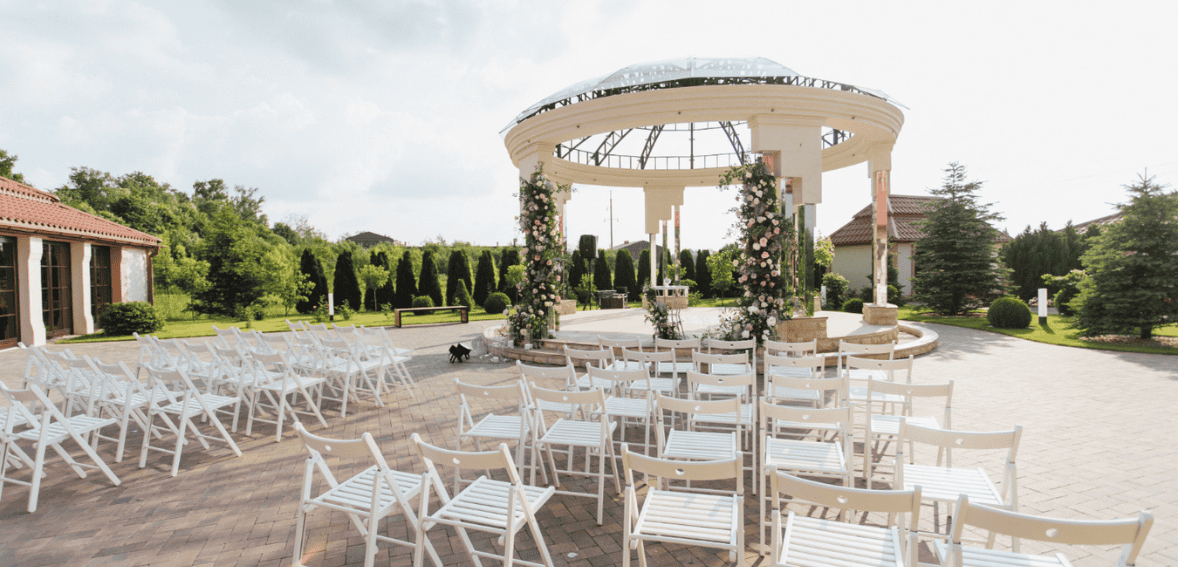
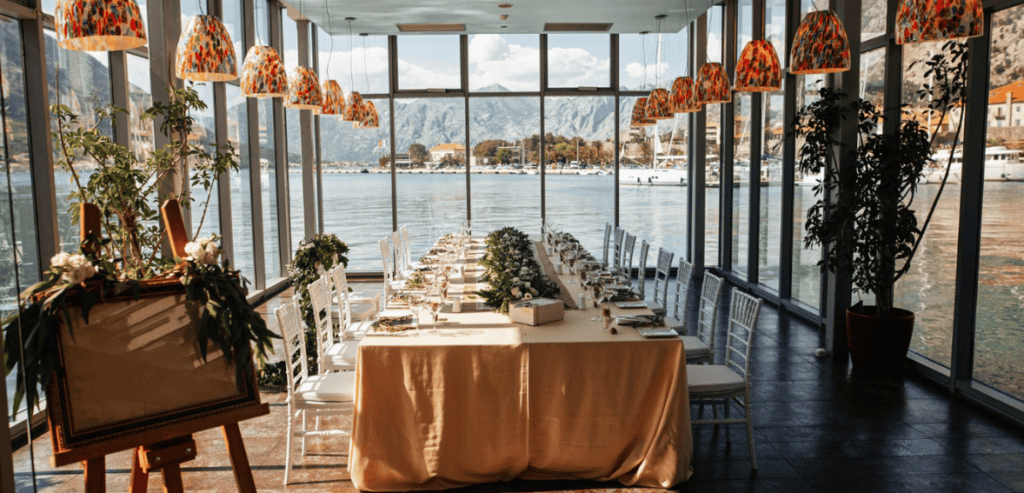
Where practical, key spaces can be partially staged to help prospects understand their potential. This does not require a full event setup. A few tables in a typical arrangement or sample lighting can communicate more than an empty room. If a room is unavailable because another event is being prepared, staff should know that before the tour and have photographs, floor plans or an alternative way to explain the space rather than discovering the problem in front of the client.
Decide What Success Looks Like Before the Tour
The objective of a venue tour is not always an immediate signature. Depending on the client’s stage in the buying process, a successful outcome may be placing a temporary hold on the date, requesting a proposal, confirming a second visit or bringing another decision-maker into the conversation. The salesperson should know the most realistic next step before the meeting begins.
This changes the way the tour is handled. A client making a final comparison between two venues may need more detailed answers about pricing, inclusions and contract terms. Someone attending an early research visit may need a clearer introduction to what the venue can provide. Defining the objective prevents the salesperson from either pushing too hard or ending the visit without moving the enquiry forward.
Build a Logical Tour Route
The order in which spaces are shown influences how the prospect experiences the venue. A random walk through whichever rooms happen to be open can make even an impressive property feel confusing. The route should follow the event journey where possible, beginning with arrival and moving through the major stages guests would experience.
For example, the tour might begin at the entrance, continue to a reception or registration area, move into the main event space and then finish with supporting areas such as breakout rooms, outdoor spaces or preparation rooms. A clear route helps prospects visualise their event in sequence. It also creates natural opportunities for the salesperson to discuss guest movement, timing and operational details without turning the visit into a list of disconnected features.
Start With the Arrival Experience
The first space shown should often be the place guests will encounter first. Walk through how attendees would arrive, where they would park or be dropped off and how they would find the correct entrance. Discuss signage possibilities, accessibility and the way staff can guide guests during busy arrival periods.
This part of the tour can reveal important concerns early. Clients may need space for registration desks, welcome drinks, security checks or coat storage. Showing how the venue handles arrival demonstrates that the team is thinking about the entire event rather than only the main room. It also helps the client picture the experience from the guest’s perspective, which can make the venue feel more practical and complete.
Show the Most Important Space at the Right Moment
The main event area is usually the centrepiece of the tour, but showing it first is not always the best strategy. Building context through the arrival experience can make the main room feel more connected to the rest of the event. When the group reaches it, allow enough time for the client to take in the space rather than immediately beginning a long explanation.
Then connect the room to the client’s plans. Instead of simply stating capacity, explain how that capacity changes under relevant seating or layout options. Discuss where a stage, dance floor, presentation screen, head table or other key feature might go based on the event type. The objective is to help the client imagine their own event in the room rather than simply admire the architecture.
Use Capacity Carefully
Capacity numbers can be misleading when presented without context. A room may technically hold a certain number of people, but the usable capacity changes depending on tables, staging, entertainment, catering stations and circulation requirements. A client planning for 150 guests needs to know how comfortable the room will feel at that number, not just whether the maximum capacity exceeds 150.
Explain the layouts that are commonly used and how each affects space. If a client is near the upper end of a room’s practical capacity, be transparent about the trade-offs. Overselling the space may help secure a booking initially, but it can create problems later when the client realises their preferred layout does not fit comfortably. A confident venue can explain both possibilities and limitations without making the tour feel negative.
Talk About Flow, Not Just Rooms
Clients often focus on individual spaces, but successful events depend on how those spaces work together. Discuss how guests move between arrival, dining, presentations, entertainment and departure. For larger venues, explain whether multiple events can occur at the same time and how guest groups remain separated where necessary.
Flow also includes operational movement. Catering staff, suppliers, entertainers and event teams may need access routes that do not interfere with guests. Showing that these logistics have been considered can increase confidence in the venue’s experience. It moves the conversation beyond appearance and demonstrates that the property has been designed or managed with real event operations in mind.
Use a Venue Tour Checklist Without Sounding Scripted
A venue tour checklist can prevent important information from being forgotten, particularly when several staff members conduct tours. It can include essential spaces to show, common questions to cover and operational topics such as accessibility, parking, catering, power, Wi-Fi and event timing. The checklist creates consistency across the team.
However, it should not force every tour into exactly the same conversation. The strongest guides use the checklist as a safety net rather than a script. If a prospect is highly interested in outdoor ceremony options, spending more time there may be more valuable than explaining every conference feature. Staff should know the standard information well enough that they can adapt naturally while still covering the essentials before the tour ends.
Ask Questions While You Walk
The tour should be a conversation rather than a presentation. Asking questions throughout the visit helps uncover priorities that may not have appeared in the original enquiry. A client may mention that elderly relatives are attending, that a large amount of décor is planned or that their team needs early access for setup.
These details create opportunities to make the tour more relevant. If accessibility matters, show the easiest routes rather than simply stating that the venue is accessible. If setup time is important, discuss load-in arrangements and access windows. Questions also keep the prospect engaged because the tour becomes focused on solving their event needs rather than hearing everything the venue has to say about itself.
Avoid Feature Dumping
Venue teams often know dozens of facts about the property and may feel that a tour is the chance to share all of them. Too much information can reduce the impact of the most important points. A client may leave remembering very little because they were given a constant stream of capacities, measurements, technical specifications and optional services.
Prioritise information that directly relates to the event being discussed. Technical details can be provided later in a proposal or planning document if they are not essential to the decision today. The tour should create clarity and confidence. The prospect needs to understand why the venue works for their event, not memorise every specification associated with the building.
Handle Pricing Questions Clearly
Pricing often comes up during the tour, even if a formal proposal will be prepared afterwards. Staff should understand the venue’s pricing structure well enough to explain major charges and what they include. Vague responses such as “that depends” without further explanation can make clients worry about hidden costs.
When exact pricing depends on choices that have not yet been made, explain what drives the variation. For example, total cost may depend on guest count, room selection, catering package, day of the week or additional services. Give enough information for the client to understand the framework while avoiding promises that cannot be supported. Clear commercial conversations build trust and make the later proposal easier to understand.
Be Honest About Limitations
Every venue has limitations. There may be noise restrictions, fixed closing times, restricted loading periods, limited parking or rules about décor and external suppliers. Attempting to hide these issues during the sales process can create conflict later.
Instead, explain limitations alongside practical solutions where possible. If parking is limited, describe nearby alternatives or transport arrangements commonly used by clients. If sound restrictions apply outdoors after a certain time, explain how events normally transition indoors. Addressing concerns calmly can demonstrate experience. Clients often care less about whether a venue has limitations than whether the team knows how to manage them.
Show Behind-the-Scenes Areas When They Matter
Not every client needs to see every service corridor or storage room, but certain operational spaces can be important. Wedding clients may want to see preparation rooms. Corporate organisers might need loading access or green rooms for speakers. Event professionals may want to understand supplier entry points and storage areas.
Showing these spaces when relevant can make the venue feel more operationally capable. However, the spaces should be presentable enough for a client visit. If a behind-the-scenes area is currently being used heavily, it may be better to explain it with photographs or a floor plan. The tour should support confidence rather than expose unnecessary clutter that has little bearing on the event.
Use Visual Examples at the Right Time
Photographs from previous events can help prospects understand how an empty room changes under different layouts or décor styles. They are especially useful when the space is being shown without furniture or when another setup currently prevents the client from seeing their preferred configuration.
Visuals work best when they support the conversation rather than replace it. If the client wants a formal dinner, show an example of that room in a similar setup. If they are planning a conference, images of theatre seating and stage arrangements may be more useful than wedding photographs. Relevant examples make the venue’s possibilities easier to understand and reduce the amount of imagination required from the prospect.
Discuss Catering and Supplier Logistics
Food and beverage arrangements can influence a venue decision significantly. Explain whether catering is handled internally, through approved suppliers or through outside caterers. If minimum spends, service charges or specific rules apply, make sure the client understands the basic structure before moving too far into the booking process.
The same applies to other suppliers. Clients may want to bring photographers, entertainers, production teams, decorators or rental companies. Discuss any relevant access requirements and restrictions. A venue that makes supplier coordination straightforward can be attractive to planners who know how much operational effort events require. This is another area where practical clarity can be more persuasive than a simple sales claim about excellent service.
Address Accessibility Properly
Accessibility should be part of the route rather than a statement made in passing. If the venue has accessible entrances, elevators, restrooms or designated parking, show the relevant areas when they matter to the client. Explain any parts of the property where access is more limited.
This approach is more helpful than giving a broad assurance without demonstrating how the guest journey works. Clients may have particular concerns depending on their attendees. Walking through the route can identify practical details before the event is booked and allows the venue to recommend appropriate room choices or arrival arrangements.
Let the Client Experience the Space
A tour should not be so tightly controlled that the client has no time to look around. Allow pauses in important spaces. Clients may want to stand at the centre of a room, check a view, take photographs or discuss possibilities privately with another decision-maker.
These quiet moments can be valuable because the client is mentally placing their event in the venue. Sales staff do not need to fill every silence. Staying available for questions while giving people space to absorb the property can create a more comfortable experience. The aim is to guide the visit without making it feel rushed or overly managed.
Recognise Buying Signals
Prospects often indicate increasing interest through the questions they ask. Questions about available dates, deposit amounts, setup access or contract timelines can suggest that the conversation is moving from general research towards a decision. Staff should recognise these signals and respond with an appropriate next step.
That does not mean forcing an immediate commitment. Instead, make it easy for the client to move forward. If their preferred date is available, explain what is required to hold or secure it. If they need a proposal first, confirm exactly what information will be included and when they should expect it. A tour that generates strong interest can lose momentum if the booking process afterwards is unclear.
Finish in a Space That Supports the Conversation
The final stop on the route should allow time for questions and discussion. Ending beside a busy exit or while walking through a corridor can make the meeting feel abrupt. If possible, finish somewhere comfortable where pricing, availability and next steps can be discussed properly.
This is also a good time to revisit the client’s original priorities. Briefly connect what they have seen with their event needs. If they wanted outdoor space, flexible capacity and convenient supplier access, summarise how the venue addresses those points. This reinforces the reasons the property may be a good fit without repeating the entire tour.
Ask What Could Stop Them From Booking
One useful question near the end is whether the client has any concerns that could prevent them from moving forward. This gives the salesperson a chance to address an issue while the prospect is still on site. The concern might involve cost, capacity, transport, accommodation, available dates or a feature they expected but did not see.
Not every concern can be solved, and staff should not promise exceptions they cannot deliver. However, understanding objections is better than allowing the prospect to leave with unanswered doubts. It also provides useful insight into how the venue compares with competitors. Even when the booking is not secured, the conversation can improve future sales practices.
Define the Next Step Before the Client Leaves
A tour should rarely end with “let us know what you decide.” That places all responsibility on the prospect and makes it easy for the enquiry to lose momentum. Instead, agree on a specific next action. This might be sending a tailored proposal, checking an alternative date or scheduling a follow-up conversation.
A venue tour checklist should include this final step because it is easy to focus so heavily on the walkthrough that the sales process is forgotten. The next action should have a timeframe and an owner. If the venue promises a proposal by the next afternoon, it should arrive when promised. Reliability immediately after the tour reinforces the professionalism demonstrated during the visit.
Send a Personalised Follow-Up
The follow-up should reflect the conversation rather than looking like an automated brochure. Refer to the event, preferred date and the spaces or options discussed. If the client asked a question that could not be answered during the tour, include the answer.
This message can also contain the formal proposal, floor plan, photographs or other relevant materials. Avoid overwhelming the client with every document the venue possesses. Send what helps them make the next decision. A personalised follow-up shows that the venue was listening and makes it easier for the prospect to share accurate information with other decision-makers who could not attend.
Follow Up Without Becoming Pushy
Some clients need time to compare venues, discuss budgets or consult other people. Follow-up should maintain momentum without becoming excessive. If a proposal was sent and no response arrives, a polite check-in can ask whether the client has questions or needs any additional information.
Timing should reflect the urgency of the enquiry. If the desired date is receiving other interest, communicate that honestly rather than creating artificial pressure. If the event is many months away and the client is still researching, repeated daily messages are unlikely to help. Good follow-up keeps the venue present in the decision while respecting the buyer’s process.
Record What Happened During the Tour
After the client leaves, update the sales or customer relationship management system while the conversation is still fresh. Record major preferences, concerns, the spaces discussed and agreed next steps. If several employees might interact with the prospect later, these notes help everyone continue the conversation consistently.
This information is also valuable for sales analysis. Over time, the venue may discover that certain objections appear frequently or that specific tour routes produce stronger booking rates. Recording outcomes creates data that can improve both the tour itself and the broader sales process. Without notes, valuable insights disappear as soon as the salesperson moves to the next enquiry.
Track Tour-to-Booking Conversion
The number of tours completed is useful, but the number that become bookings is more important. Track how many qualified prospects visit and what percentage eventually sign contracts. The team can also look at conversion by event type, salesperson, lead source or room.
If tours generate significant interest but few bookings, investigate where the process breaks down. Pricing may be unclear, follow-up may be too slow or prospects may be seeing spaces that do not fit their needs. If one employee consistently converts more tours, observe how that person prepares, routes the visit and handles questions. Conversion data can turn venue tours from an informal activity into a measurable part of the sales process.
Review and Improve the Tour Process
Venue tours should evolve as the property, customer expectations and event offerings change. Teams can periodically walk through the normal route themselves and look for areas that feel confusing or unnecessary. Updated photographs, new room configurations or revised pricing may require changes to the conversation.
A regularly reviewed venue tour checklist helps make improvements repeatable across the team. New staff members can learn the expected process, while experienced team members can still personalise each visit. The checklist should not become a rigid document that never changes. It should reflect what the venue has learned about the questions, concerns and decision factors that matter most to prospective clients.
Turning a Venue Tour Into a Booking Opportunity
A venue tour closes more effectively when it feels like a planning conversation rather than a property inspection. Preparation allows the salesperson to understand what matters before the client arrives. A logical route helps the prospect visualise how their event will unfold, while relevant questions and clear answers build confidence in the venue team’s ability to deliver it.
The process continues after the walkthrough. Defining a next step, sending a personalised follow-up and recording the outcome keep the enquiry moving. No tour can guarantee a booking, because pricing, dates and personal preferences will always influence the final decision. However, a consistent approach can make sure qualified prospects leave with a clear understanding of what the venue offers, how it fits their plans and what they need to do next. That is what turns a simple walkthrough into a genuine sales opportunity.